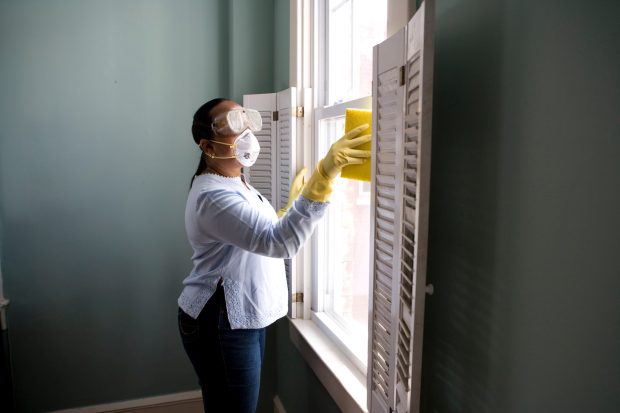
Home renovations are a great way to boost your home’s curb appeal and make it more functional. This can add significant value to your home and make it more appealing to potential buyers when you decide to sell. However, renovation projects often leave a lot of dirt and dust, especially if it involves sawing and sanding drywall, wood, or tile. Extended exposure to construction dirt and dust can harm your health, causing allergy symptoms and respiratory issues. It’s critically important to perform post-renovation cleaning immediately after completing your home improvement project.
Post-renovation cleaning helps to remove construction dirt, dust, and debris from your house, creating a clean and safe environment. However, to minimize the risk of prolonged exposure to construction dust and dirt during the cleanup process, consider hiring professional cleaning services like HAZWOPER Laborers to help remove hazardous waste from the site. Professional cleaners also have the necessary tools and equipment for the job as well as protective gear to protect them from the risk of construction dust and other hazardous waste. In this post, we’ll look at some tips to help ensure your renovation cleaning is as efficient and detailed as possible to get your house in order:
1. Remove Trash and Debris
Start cleaning by removing any trash and debris left after the renovation or remodel is complete. If there’s little trash, put it in trash bags and place it outside for the local waste company to collect. If you have a large amount of construction trash and debris, consider renting a dumpster bag or getting professional junk removal, as this can be more efficient and cost-effective. However, if you have a general contractor, they’ll remove all the construction debris and trash from the site before leaving.
2. Dry Cleaning
Once construction trash is removed, remove any remaining debris and dust present. Start vacuuming, sweeping, and mopping from the top of the room and work your way down, ensuring you remove all the dust and dirt on surfaces. A good vacuum cleaner can help ease the job since it has enough suction power to collect even larger dirt particles and can get rid of dust from hard-to-reach spots.
Using a broom, sweep as much dust and dirt on the floors, shelves, and counters as possible. Remember to vacuum inside the cabinets to eliminate any sawdust present. For the walls and ceiling, wipe off dust using a broom with a clean cloth at the end. Remove stickers on appliances and glass and wipe off any dust on windows, doors, and partitions. Dry cleaning the site first helps make it easier and less time-consuming during the deep cleaning. You may also want to remove paint spots, stains, adhesive residue, and caulking splashes on surfaces.
During the dry cleaning phase, it’s important to seal off any areas that weren’t touched by the renovation. Consider sealing doorways using plastic to prevent the dust from getting into other parts of your home while sweeping and vacuuming. Also, cover vents in the area to protect your HVAC system from dust and dirt particles.
3. Deep Cleaning
After you’ve finished dry cleaning, perform a more thorough cleaning by going over the surfaces again and removing any remaining dirt and dust with a damp cloth. Doing a more comprehensive cleanup of the room is crucial since dust will often find its way onto surfaces even after the first cleanup. So, the second pass helps ensure that everything is entirely clean.
Like dry cleaning, start from the top deep cleaning, and work your way down. Using a wet cloth, wipe the ceiling fan blades and light fixtures. Then wipe the walls, ensuring the paint is dry before using a wet cloth. Clean glass doors, shower cubicles, decorations, door knobs, and windows with a squeegee. Work your way down to the baseboards, cabinets, furniture, and shelves. Ensure you pay more attention to your kitchen and bathroom by scrubbing everything properly. Thoroughly clean the floors and wash the carpets once you’re done mopping the floors.
4. Upholstery Surfaces
Your upholstery can attract a lot of fine dust particles released during the construction project. It’s crucial you deep clean or vacuum your upholstery after a renovation, even if it looks clean. Vacuuming helps remove dust and grime seated deep in the fabric. To increase cleaning efficiency, clean other parts of your furniture and furnishings using microfiber mops, pads, and cloths.
Microfiber materials allow for more efficient cleaning since they have smaller fibers, which are extra-light and non-abrasive. They also collect fine particles, like hair, water, and residue dust, more effectively, making surfaces spotless. Consider hiring an upholstery cleaner to handle this part of the post-renovation process more effectively and efficiently.
5. Check Air Vents and HVAC Filters
Don’t forget to vacuum vents and HVAC filters since they often collect dust that may spread to other parts of your home and affect indoor air quality. Depending on the size of your renovation project, you may consider hiring an HVAC expert to professionally clean vents and the entire system to ensure it doesn’t spread dirt and dust particles.
Alternatively, you may need to clean and vacuum inside the air vents until they’re squeaky clean. This may also be an excellent time to confirm the condition of your air filters to ensure they’re clean and properly functioning. If needed, replace the air filters with new ones to ensure your HVAC unit doesn’t spread dust into your home, reducing indoor air quality.
6. Touch-up Clean
Several days after deep cleaning your house, perform a touch-up to remove any dust that may have settled on surfaces. You may also want to remove fingerprints and smudges on the mirrors and windows. Wipe down the windows and walls with a damp microfiber cloth to remove any remaining signs of construction and make your home look clean and fresh.
Endnote
Post-renovation cleaning is crucial for getting rid of construction dirt, debris, and dust that could be hazardous to your health. Using the tips above can help you keep your house looking clean and fresh after undertaking a renovation project. Always prepare the renovation site before the construction work begins since it can save you a lot of time and effort during the cleaning process.


